Zusammenfassung aller Masseverbindungen (in Arbeit). Zum Vergrößern der Bilder einfach draufklicken.
Übersicht


Front
At the mounting point of each radiator support brace. On page 1-3-1 of the parts manual the brace is parts ID #1. The bolt where it attaches to the frame provides grounds for much of the front of the car (lights, horns, etc.). It helps to remove the cover to the brake fluid reservoir, then it is easy to access from there. There are ground points on both of the braces.
Es gibt mehrere Masseverbindungen hinter der Frontlichtbefestigung.
Innenraum
 Neben den Lüftungsschächten der Mittelkonsole.
Am Autoradio rechts / A/C Metall Klammer(dash). Man muß die Center Console abnehmen.
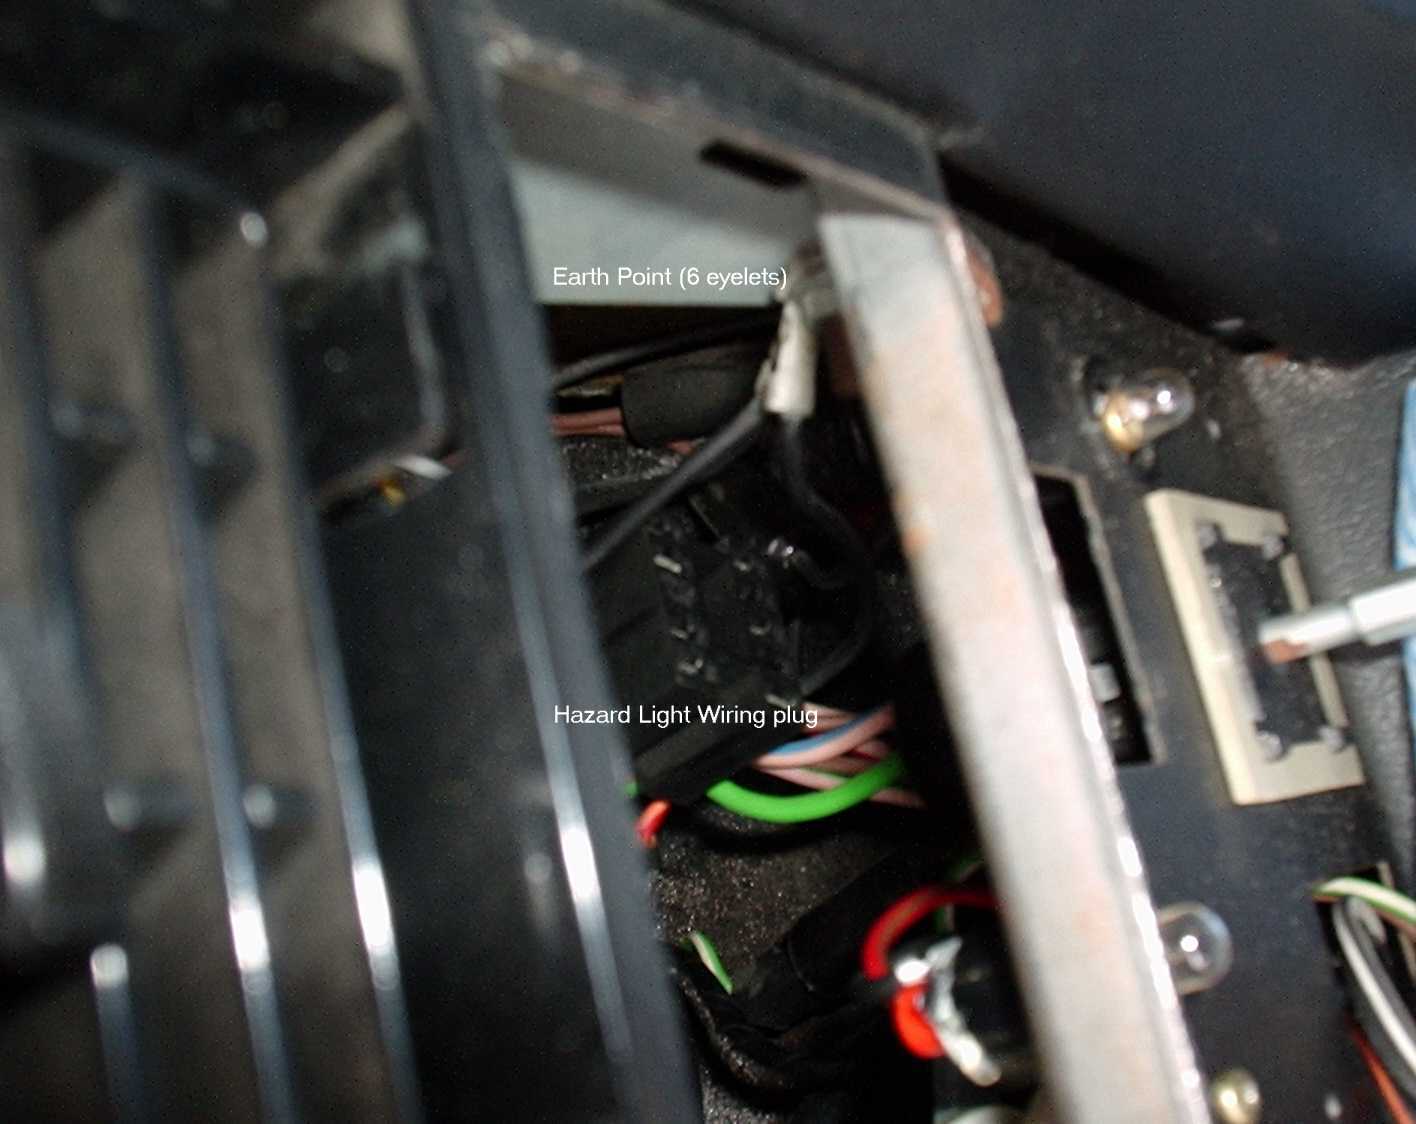
Auf der Beifahrerseite direkt hinter der Gepäckablage. Man muß die Abdeckung über der Gepäckablage (parcel shelf wall) abnehmen.
Drivers side, under the parcel shelf with the ECU mountings & harnesses.
Motorraum
Auf der Fahrerseite geht ein Massekabel zu einer der Schrauben, die den Zündwiderstand an seine Metallhalterung befestigt.
Ein Massekabel geht auf die Schraube, die den 'Vacuum advance solenoid' an den Gemischregler befestigt.
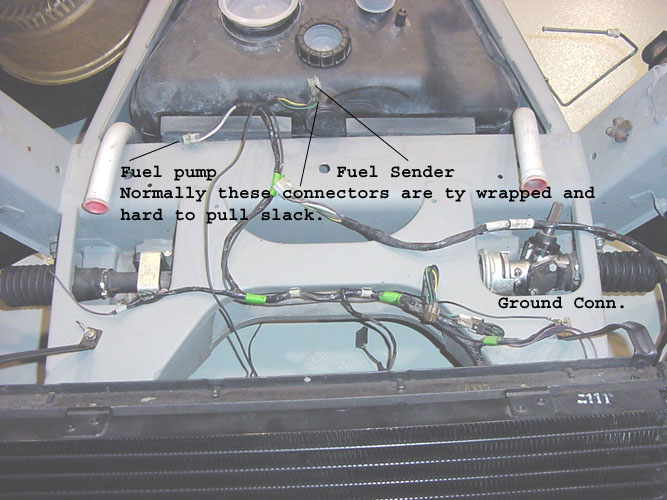
Auf der Beifahrerseite gibt es eine sehr wichtige Verbindung vom Rahmen (direkt unter dem 'jump start lug') zum Kabelbaumkasten.
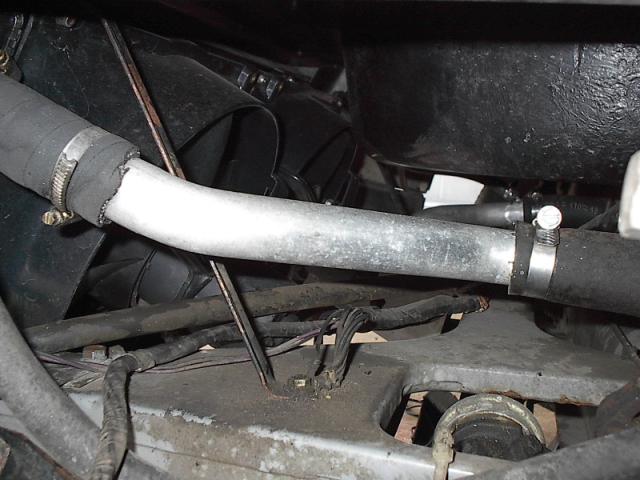
Auf der Beifahrerseite, Masseband zwischen Motor und Motorbefestigung.
Passengers side, on the forward side of the intake manifold, with a red heat shrink & blade connector. This one comes from a harness & if unplugged causes the Lambda system to not operate correctly.
There's a connector with about 9 terminals, one is ground, that's parked inside the washer bottle cover. But it's not technically a "ground point". But it does ground much of the dashboard area! The black cover with the bottle inside it that's held on with way too many rusty screws. You can usually pull the cable out and get to the plug without taking the cover off. Carefully pull out the grommet that's right next to the cover.
Heck
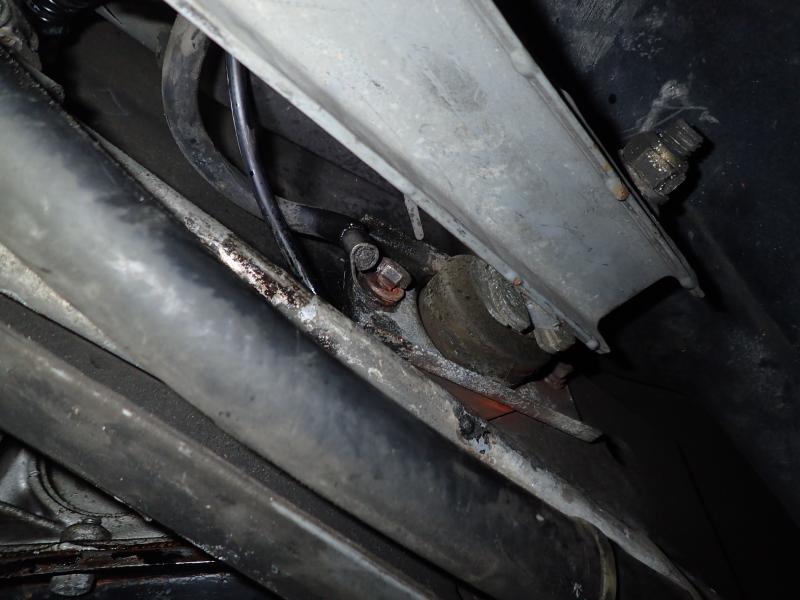
Auf der Beifahrerseite geht das Baterie Masse Kabel zu einem der Schrauben in der Nähe des Längslenkers (Trailing Arm) (Nicht die Querlenkerverbindungschraube). Vorher muß die Konterschraube auf der Rückseite gelöst werden.
Verbindung zum Rahmen hinter jedem Rücklicht (nur für Anti-Static, kann ignoriert werden).
Übersicht
Front
At the mounting point of each radiator support brace. On page 1-3-1 of the parts manual the brace is parts ID #1. The bolt where it attaches to the frame provides grounds for much of the front of the car (lights, horns, etc.). It helps to remove the cover to the brake fluid reservoir, then it is easy to access from there. There are ground points on both of the braces.Es gibt mehrere Masseverbindungen hinter der Frontlichtbefestigung.
Innenraum
Am Autoradio rechts / A/C Metall Klammer(dash). Man muß die Center Console abnehmen.
Auf der Beifahrerseite direkt hinter der Gepäckablage. Man muß die Abdeckung über der Gepäckablage (parcel shelf wall) abnehmen.
Drivers side, under the parcel shelf with the ECU mountings & harnesses.
Motorraum
Auf der Fahrerseite geht ein Massekabel zu einer der Schrauben, die den Zündwiderstand an seine Metallhalterung befestigt.Ein Massekabel geht auf die Schraube, die den 'Vacuum advance solenoid' an den Gemischregler befestigt.
Auf der Beifahrerseite gibt es eine sehr wichtige Verbindung vom Rahmen (direkt unter dem 'jump start lug') zum Kabelbaumkasten.
Auf der Beifahrerseite, Masseband zwischen Motor und Motorbefestigung.
Passengers side, on the forward side of the intake manifold, with a red heat shrink & blade connector. This one comes from a harness & if unplugged causes the Lambda system to not operate correctly.
There's a connector with about 9 terminals, one is ground, that's parked inside the washer bottle cover. But it's not technically a "ground point". But it does ground much of the dashboard area! The black cover with the bottle inside it that's held on with way too many rusty screws. You can usually pull the cable out and get to the plug without taking the cover off. Carefully pull out the grommet that's right next to the cover.
Heck
Auf der Beifahrerseite geht das Baterie Masse Kabel zu einem der Schrauben in der Nähe des Längslenkers (Trailing Arm) (Nicht die Querlenkerverbindungschraube). Vorher muß die Konterschraube auf der Rückseite gelöst werden.Verbindung zum Rahmen hinter jedem Rücklicht (nur für Anti-Static, kann ignoriert werden).